iOS에서 애니메이션 처리를 하기 위해서는 다음과 같이 보통 UIView.animate()나 CABasicAnimation을 이용하게 됩니다.
1. myView의 alpha값을 0부터 1까지 애니메이션 적용
myView.alpha = 0
UIView.animate(withDuration: 0.2) {
    myView.alpha = 1
}
2. imageVIew 회전 애니메이션 적용
let rotateAnimation = CABasicAnimation(keyPath: "transform.rotation")
rotateAnimation.fromValue = 0.0
rotateAnimation.toValue = CGFloat(Double.pi * 2)
rotateAnimation.isRemovedOnCompletion = false
rotateAnimation.duration = 3
rotateAnimation.repeatCount=Float.infinity
imageView.layer.add(rotateAnimation, forKey: nil)
하지만 위와 같이 처리되는 애니메이션들은 UIView나 CALayer의 미리 정의된 속성 값들에 한해서만 가능한데요, 개발자가 추가한 property에 애니메이션을 적용하고 싶은 경우도 분명 존재합니다.
그래서 오늘은 CALayer를 이용하여 custom property에 애니메이션을 적용하는 방법을 알아보고자 합니다.
UIView의 기본 레이어 변경하기
CALayer가 가지고 있는 custom property에 애니메이션을 적용해 볼 것이기 때문에, custom CALayer 클래스를 생성하여 해당 클래스에서 프로그래스 바를 그리는 것을 구현해보고자 합니다.
레이어 클래스를 생성하여 UIView에 addLayer()를 해도 되지만, UIView가 기본으로 가지고 있는 레이어를 custom CALayer로 변경해주면 굳이 불필요하게 addLayer()를 하지 않아도 됩니다.
먼저 다음과 같이 화면 중앙에 가로로 붉은 라인을 그려주는 레이어를 작성합니다.
class CustomAnimationLayer: CALayer {

    override func draw(in ctx: CGContext) {
        super.draw(in: ctx)
        let linePath = UIBezierPath()
        linePath.move(to: CGPoint(x: 0, y: bounds.height / 2))
        linePath.addLine(to: CGPoint(x: bounds.width, y: bounds.height / 2))
        ctx.setLineWidth(bounds.height * 0.01)
        ctx.setStrokeColor(UIColor.red.cgColor)
        ctx.addPath(linePath.cgPath)
        ctx.strokePath()
    }

}
그리고 위 CustomAnimationLayer를 기본 레이어로 갖는 UIView는 다음과 같이 구성할 수 있습니다.
class CustomAnimationView: UIView {

    // UIView의 기본 레이어를 CustomAnimationLayer로 변경
    override class var layerClass: AnyClass {
        return CustomAnimationLayer.self
    }

    // 변경된 기본 레이어 property에 접근하기 위한 변수 재정의
    override var layer: CustomAnimationLayer {
        return super.layer as! CustomAnimationLayer
    }

    override init(frame: CGRect) {
        super.init(frame: frame)
        initLayer()
    }

    required init?(coder: NSCoder) {
        super.init(coder: coder)
        initLayer()
    }

    private func initLayer() {
        layer.setNeedsDisplay() // CustomAnimationLayer의 draw()가 호출되도록 화면 갱신 요청
    }

}- layerClass : 이 property를 override 하여 UIView의 기본 레이어 클래스 타입을 변경할 수 있습니다.(레이어 객체 생성을 개발자가 직접 하지 않음)
- layer : 이 property를 override하여 변경된 기본 레이어 객체에 접근할 수 있습니다. 굳이 CustomAnimationLayer에 정의된 함수나 변수에 접근할 일이 없다면 override하지 않아도 됩니다.
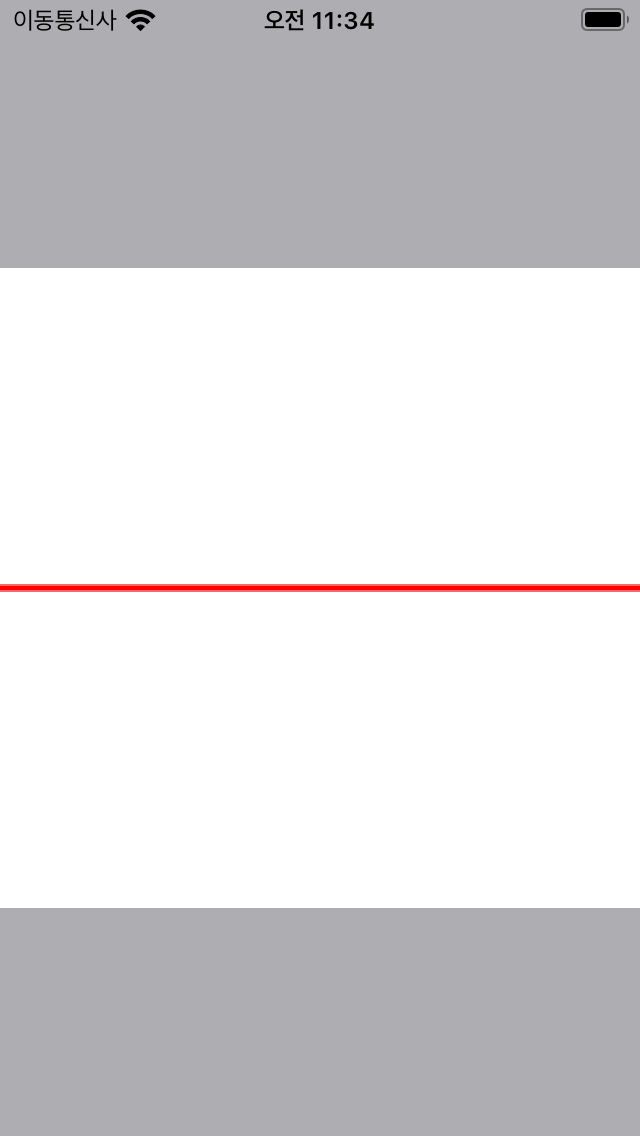
다음은, 위와 같이 생성한 CustomAnimationView를 화면 중앙에 정사각형으로 위치시킨 후 실행시켜본모습입니다.
Custom Property에 애니메이션 적용
이제 위에서 작성한 뷰에 애니메이션을 적용하여 붉은색 라인이 프로그래스 바처럼 점점 늘어나는 애니메이션을 적용해 보도록 하겠습니다.
CustomAnimationLayer을 다음과 같이 변경합니다.
class CustomAnimationLayer: CALayer {

    @objc dynamic var percentage: CGFloat = 0.0

    override class func needsDisplay(forKey key: String) -> Bool {
        if key == "percentage" {
            return true
        }

        return super.needsDisplay(forKey: key)
    }

    override func draw(in ctx: CGContext) {
        super.draw(in: ctx)
        let linePath = UIBezierPath()
        linePath.move(to: CGPoint(x: 0, y: bounds.height / 2))
        linePath.addLine(to: CGPoint(x: bounds.width * percentage, y: bounds.height / 2))
        ctx.setLineWidth(bounds.height * 0.01)
        ctx.setStrokeColor(UIColor.red.cgColor)
        ctx.addPath(linePath.cgPath)
        ctx.strokePath()
    }

}- percentage : CABasicAnimation이 애니메이션 처리를 위해서는 반드시 @objc dynamic var로 정의해야만 합니다.
- needsDisplay() : 전달된 key가 업데이트가 필요한 것인지 여부를 반환하는 함수입니다. 여기에 원하는 property를 추가하여 true를 반환하도록 해 줍니다.
- draw() : 여기서 bounds.width * percentage를 통해 line이 점점 늘어나 보이도록 처리하였습니다.
그리고, CustomAnimationView에서 CABasicAnimation을 추가해 줍니다.
class CustomAnimationView: UIView {

    ......

    private func initLayer() {
        layer.setNeedsDisplay() // CustomAnimationLayer의 draw()가 호출되도록 화면 갱신 요청

        let animation = CABasicAnimation(keyPath: "percentage")
        animation.duration = 3.0  // 3초간
        animation.fromValue = 0.0 // 0부터
        animation.toValue = 1.0   // 1까지
        // >> 애니메이션 완료 후 마지막 값을 유지하도록
        animation.isRemovedOnCompletion = false
        animation.fillMode = .forwards
        // <<

        layer.add(animation, forKey: animation.keyPath)
    }

}
3초 동안 CustomAnimationLayer의 percentage를 0부터 1까지 애니메이션 처리하도록 하고, 애니메이션 종료 후에도 마지막 값을 유지하도록 요청하였는데요, 이를 적용한 모습은 다음과 같습니다.
임의로 추가한 property에 애니메이션이 잘 적용되는 것을 볼 수 있습니다.

다음은 이렇게 애니메이션을 적용해 본 전체 코드입니다.
import UIKit

class CustomAnimationLayer: CALayer {

    @objc dynamic var percentage: CGFloat = 0.0

    override class func needsDisplay(forKey key: String) -> Bool {
        if key == "percentage" {
            return true
        }

        return super.needsDisplay(forKey: key)
    }

    override func draw(in ctx: CGContext) {
        super.draw(in: ctx)
        let linePath = UIBezierPath()
        linePath.move(to: CGPoint(x: 0, y: bounds.height / 2))
        linePath.addLine(to: CGPoint(x: bounds.width * percentage, y: bounds.height / 2))
        ctx.setLineWidth(bounds.height * 0.01)
        ctx.setStrokeColor(UIColor.red.cgColor)
        ctx.addPath(linePath.cgPath)
        ctx.strokePath()
    }

}

class CustomAnimationView: UIView {

    // UIView의 기본 레이어를 CustomAnimationLayer로 변경
    override class var layerClass: AnyClass {
        return CustomAnimationLayer.self
    }

    // 변경된 기본 레이어 property에 접근하기 위한 변수 재정의
    override var layer: CustomAnimationLayer {
        return super.layer as! CustomAnimationLayer
    }

    override init(frame: CGRect) {
        super.init(frame: frame)
        initLayer()
    }

    required init?(coder: NSCoder) {
        super.init(coder: coder)
        initLayer()
    }

    private func initLayer() {
        layer.setNeedsDisplay() // CustomAnimationLayer의 draw()가 호출되도록 화면 갱신 요청

        let animation = CABasicAnimation(keyPath: "percentage")
        animation.duration = 3.0  // 3초간
        animation.fromValue = 0.0 // 0부터
        animation.toValue = 1.0   // 1까지
        // >> 애니메이션 완료 후 마지막 값을 유지하도록
        animation.isRemovedOnCompletion = false
        animation.fillMode = .forwards
        // <<

        DispatchQueue.main.asyncAfter(deadline: .now() + 2) {
            self.layer.add(animation, forKey: animation.keyPath)
        }
    }

}'iOS > 기타' 카테고리의 다른 글
| ios 플링 애니메이션 만들기 - 1 (0) | 2025.02.03 |
|---|---|
| iOS ValueAnimator 만들기 - 2 (0) | 2022.07.05 |
| iOS ValueAnimator 만들기 - 1 (0) | 2022.07.04 |
| iOS 14 사진 접근권한 요청하기 (0) | 2022.06.29 |
| WKWebView 쿠키 공유하기 (2) | 2022.06.10 |


